Cavity Wall Insulation for Energy Savings
About a third of all the heat lost in an uninsulated home escapes through the walls, which is why cavity wall insulation plays such a vital role in improving energy efficiency. Heat will always flow from a warm area to a cold one. In winter, the colder it is outside, the faster the heat from your home will escape into the surrounding air.
Most houses built from the 1990s onwards have wall insulation to keep the heat in, but if your house is older than that, it may not have any wall insulation. If this is the case, you may be heating the outside air instead of just heating your home. Most types of walls can be insulated in one way or another, using solutions such as internal wall insulation or external wall insulation, depending on the construction. If you have a typical house with cavity walls, you could save up to £140 per year in heating bills just from insulating the walls.

Cavity and Solid Walls
The first thing you need to find out is what sort of walls you have, as this determines whether cavity wall insulation, internal systems, or external wall insulation is most appropriate. Houses in the UK mostly have either solid walls or cavity walls:
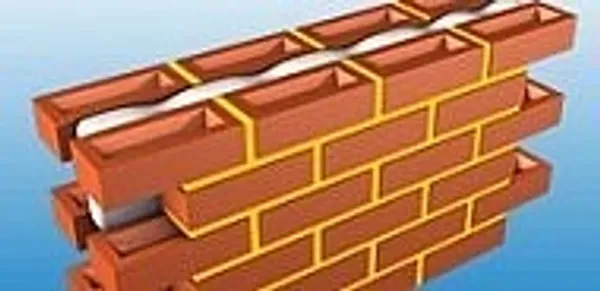
A cavity wall is made up of two walls with a gap in between, known as the cavity; the outer leaf is usually made of brick, and the inner layer of concrete.
On the other hand, a solid wall has no cavity; each wall is a single solid wall, usually made of brick or stone, and is more commonly insulated using internal wall insulation or external methods.
Working Out Your Wall Type
If your house was built after the 1920s, it is likely to have cavity walls.
Older houses are more likely to have solid walls.
If you can see the brickwork on the outside of the house, look at the pattern of the bricks.
Brick Patterns in Homes with Cavity Walls

Brick Patterns in Homes with Solid Walls

If the brickwork has been covered, you can also tell by measuring the width of the wall. Examine a window or door on one of your external walls. If a brick wall is more than 260mm thick, then it probably has a cavity; a narrower wall is probably solid. Stone walls may be thicker still, but are usually solid and typically require internal wall insulation or external wall insulation solutions.
Non-Standard Wall Types
If your house is a steel-frame or timber-framed building, or is made from pre-fabricated concrete, different rules apply for insulation. Generally, these houses don’t have a cavity to fill, but it may be possible to insulate them in the same way as a solid wall using internal wall insulation techniques. However, you may need a specialist company to insulate a non-standard wall. For further advice or to find an installer who can help you, contact the National Insulation Association.
Cavity Wall Insulation
If your home was built after 1920, the chances are that its external walls are made of two layers with a gap or cavity in between. Cavity wall insulation fills that gap, keeping the warmth in to save energy. It can also help reduce condensation inside the house if this is a problem on your external walls.
Is Cavity Wall Insulation Suitable for Your Home?
Your home will usually be suitable for cavity wall insulation if it meets these criteria:
Its external walls are unfilled cavity walls.
Your cavity is at least 50mm wide.
The masonry or brickwork of your property is in good condition.
It is more than 10 years old (most newer houses will have insulation already).
The walls are not exposed to driving rain.
Are your external walls accessible?

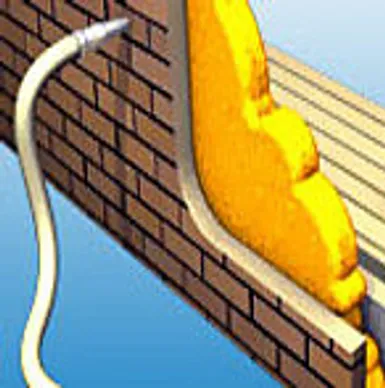
Cavity wall insulation is blown into the cavity from the outside of a house. Every part of the wall must be filled with insulation, so it’s important that the installer can reach all your external walls.
If your home’s exterior walls are joined to another house in Scotland, the installer will need to insert a cavity barrier to contain the insulation, so your neighbours aren’t affected.
What If Your House is Damp?
If you have any damp patches on your internal walls, then they should not be insulated until the problem is resolved. This is particularly important before proceeding with internal wall insulation, as trapped moisture can worsen existing issues. Speak to a builder who specialises in damp prevention.
How is Insulation Installed?
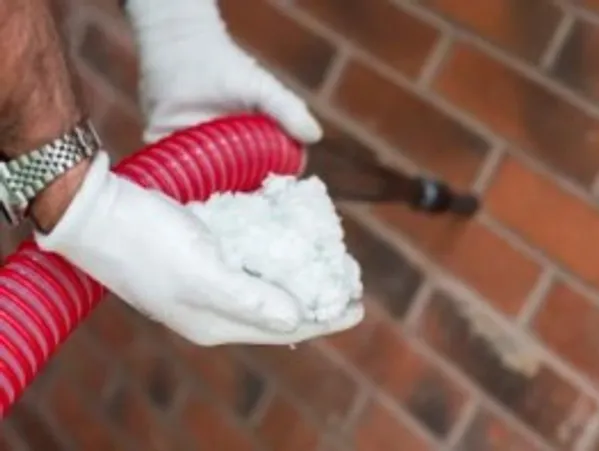
To insulate your cavity walls, the installer drills small holes around 22mm in size at intervals of around 1m in the outside wall of your home. The installer then blows insulation into the cavity using special equipment. Once all the insulation is in, the installer fills the holes in the brickwork so you’ll barely notice them.
Filling cavity walls is not a job you can do yourself; you will need to employ a registered installer. A professional insulation installation can usually be completed in around two hours for an average house with easily accessible walls. It shouldn’t make a mess. For expert advice or to book an assessment, contact us today.
What is Insulation Made of?
Cavity wall insulation can be made from three types of material: mineral wool, beads or granules, or foamed insulants.
All three are manufactured according to British standards. Foam insulation systems should be certified by the British Board of Agrément and installed according to strict guidance laid out in the associated certificates.
Greenskye Energy Solutions Ltd are proud to announce that they are offering FREE SOLAR in conjunction with SunEdison.
Heat Loss Control with Loft Insulation
Roof and Loft
In an uninsulated home, around 35 per cent of heat loss is through the walls, and 25 per cent is lost through the roof, making loft insulation one of the most effective ways to reduce heat loss. The remaining 40 per cent is lost through doors, windows and the floor. The better insulated your home is, the less heat you will be losing, meaning you do not need to run your heating as much.
Insulating your property in Scotland with measures such as loft insulation, wall insulation, and underfloor installation will help reduce your energy consumption and lower your fuel bills. Insulation can also help alleviate dampness, making it a healthier home to live in.

Heat energy is transferred from homes by conduction through the walls, floor, roof and windows. It is also transferred from homes by convection. For example, cold air can enter the house through gaps in doors and windows, and convection currents can transfer heat energy in the loft to the roof tiles.
CONTACT USChoosing Loft Insulation
Easy Access and Regular Joists
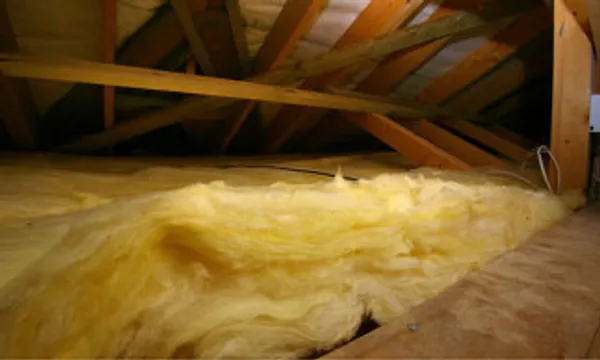
If your loft is easy to access and has no damp or condensation problems, it should be easy to insulate using standard loft insulation methods. It is possible to do it yourself. If access is easy and your loft joists are regular, you can use rolls of mineral wool insulation.
The first layer is laid between the joists – the horizontal beams that make up the floor of the loft – then another layer is laid at right angles to cover the joists and make the insulation up to the required depth. This can be done by someone competent in DIY or a professional installer.
Storage or Living Space
If you plan to use the loft or attic for storage, you will want to lay boards over the joists. Unfortunately, if you only insulate between the joists before doing this, the insulation won’t be thick enough, and additional solutions such as raised flooring or Room in Roof Insulation may be required.
To achieve adequate insulation levels, additional measures such as raising the floor height or installing rigid insulation boards above the joists may be required. This ensures heat retention while maintaining usable space. Proper insulation planning helps prevent heat loss, improves energy efficiency, and keeps the loft comfortable, safe, and suitable for regular use.
Useful Tips for Better Home Insulation

Year Experience
Insulate between the joists with mineral wool and then lay rigid insulation boards on top, with wooden boarding on top of that. You can buy insulation boards pre-bonded to floor boarding to make the job easier. Or raise the level of the floor so you can fit enough mineral wool beneath the new floor level.
If you want to use your loft as a living space, you can insulate the roof instead of the floor by fixing rigid insulation boards between the roof rafters. This approach is commonly referred to as room in roof insulation and is ideal for converted loft spaces. Boards must be cut to the correct width so that they fit snugly between the rafters. They can then be covered by plasterboard. Rafters aren’t usually very deep, so to get the best performance, you may have to insulate over them as well, using insulated plasterboard. If there isn’t room to do this, make sure you use the highest-performance insulation board.
GET IN TOUCHSpecial Loft and Roof Insulation Considerations
Inaccessible Loft Spaces
If your loft is hard to access, you can have blown insulation installed by a professional, making it a practical option for loft insulation in awkward or restricted spaces. The installer will use specialist equipment to blow loose, fire-retardant insulation material made of cellulose fibre or mineral wool into the loft. This doesn’t usually take more than a few hours.
The process is minimally disruptive, requires no structural alterations, and ensures even coverage across the loft area. Blown insulation is particularly effective at reducing heat loss, improving energy efficiency, and maintaining consistent indoor temperatures.
Installation is usually completed within a few hours, making it a quick and practical solution for homes with limited loft access while still delivering long-term thermal performance benefits.
Flat Roofs
A flat roof should preferably be insulated from above. This approach is often used alongside external wall insulation projects to improve the overall thermal envelope of the property. A layer of rigid insulation board can be added either on top of the roof’s weatherproof layer or directly on top of the timber roof surface with a new weatherproof layer on top of the insulation. This is best done when the roof covering needs replacing anyway. If your flat roof needs to be replaced anyway, you must now insulate it to comply with building regulations.
It is possible to insulate a flat roof from underneath, but this can lead to condensation problems if not completed correctly.
Installing flat roof insulation in Scotland could save you similar amounts on your heating bills to loft insulation. The savings will vary depending on how much of the property has a flat roof.
Damp Lofts
Insulation prevents heat from escaping living areas, which means your loft space will become cooler once insulation is installed. In properties where damp or condensation issues already exist, this temperature change can make the problem worse if not addressed correctly.
Moisture buildup can affect insulation performance and lead to long-term structural issues. It’s important to identify the cause of damp, such as poor ventilation or roof leaks, and seek professional advice before installing insulation, so any underlying problems can be resolved first.
Pipes, Water Tank and Loft Hatch
Insulating between the joists of your loft will keep your house warmer, but make the roof space above colder. Pipes and water tanks will be more likely to freeze, so you will need to insulate them as part of a complete insulation installation approach. If your water tanks are some distance from the loft hatch, you will also need something to walk on for safe access.
The cooler air in your insulated loft could mean that cold draughts come through the loft hatch. To prevent this, fit an insulated loft hatch and put strips of draught-excluding material around the hatch edges.